After logging in to meviy, follow the steps below to get quotes and place orders based on 3D data of machined plates.
Step 1: Automatic Hole Type Recognition Settings
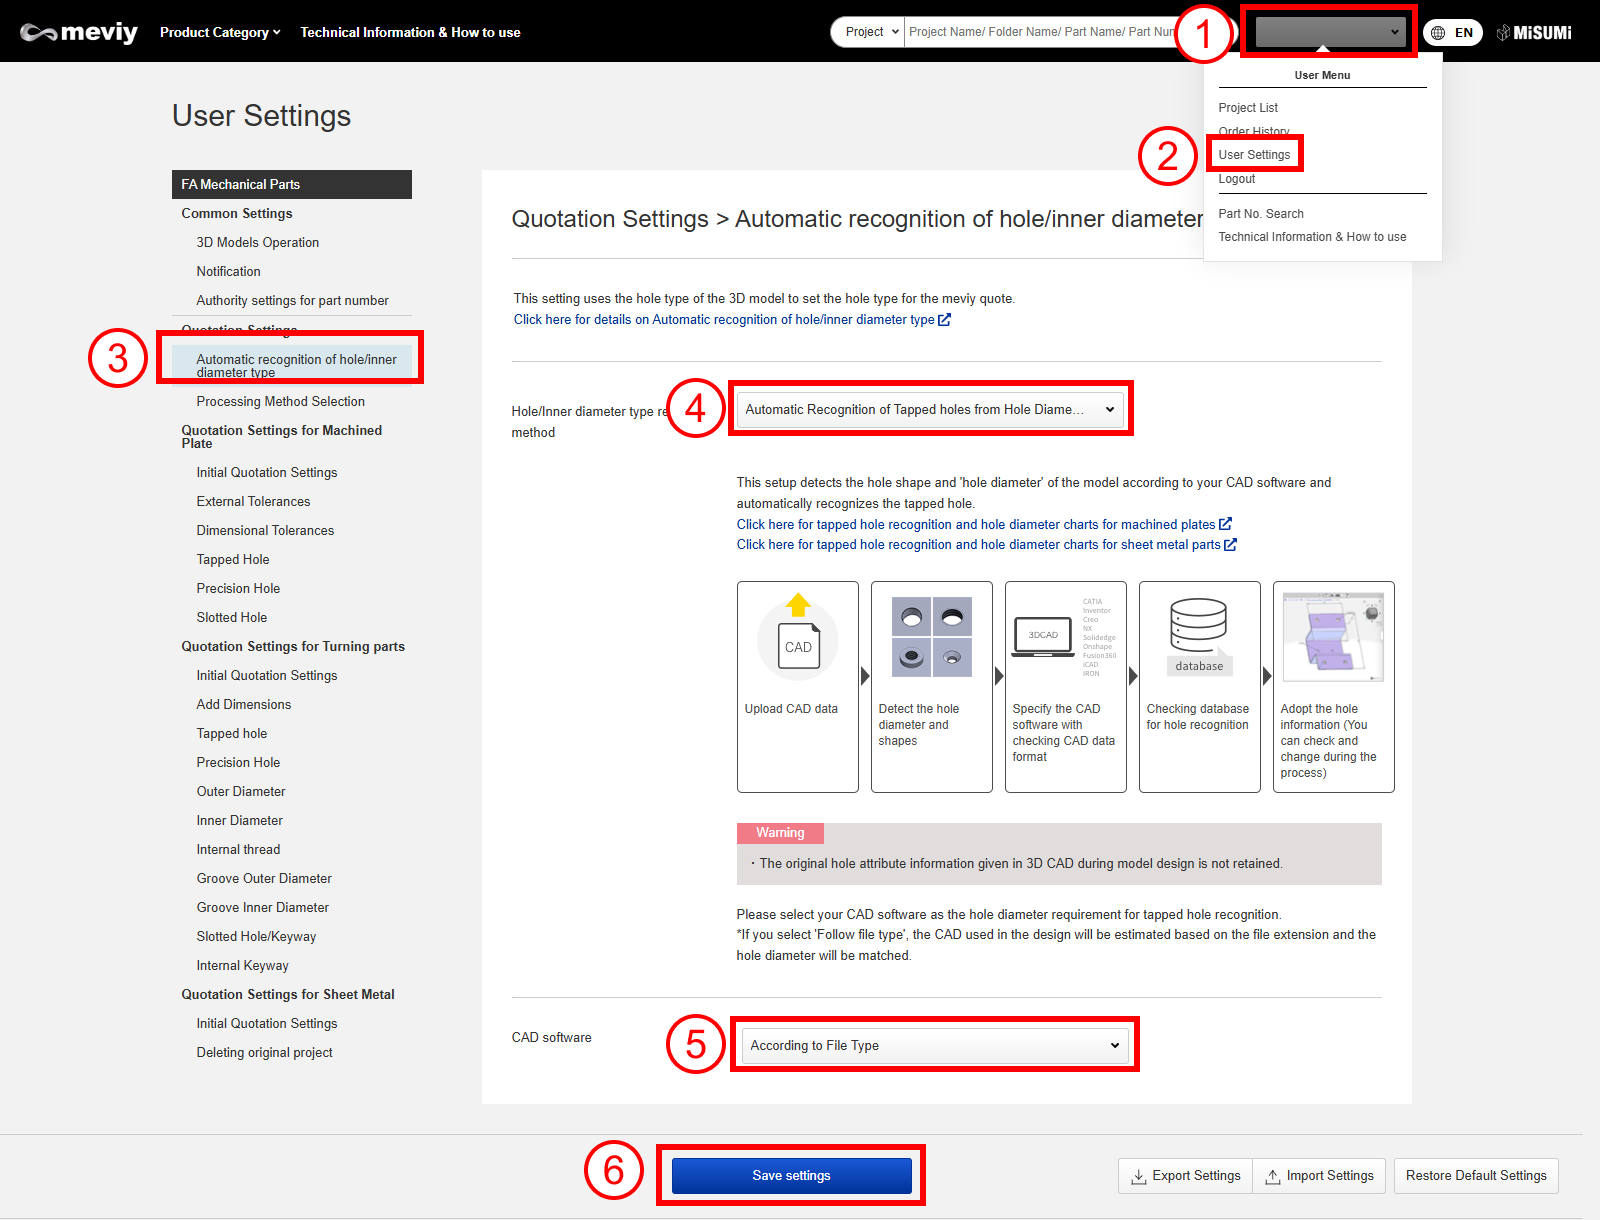
If you are uploading a neutral format, configure the settings for the CAD software used for modeling. On the meviy platform, the hole type is identified by referencing the hole diameter in the 3D CAD data against the hole information database. Configuring the settings for the CAD software used for the modeling improves the accuracy of the hole type identification.
(1)Point the mouse to the user name in the upper right corner of the screen. The “User Menu” will appear.
(2)Choose “User Settings”.
(3)Choose “Automatic Hole Type Recognition Settings”.
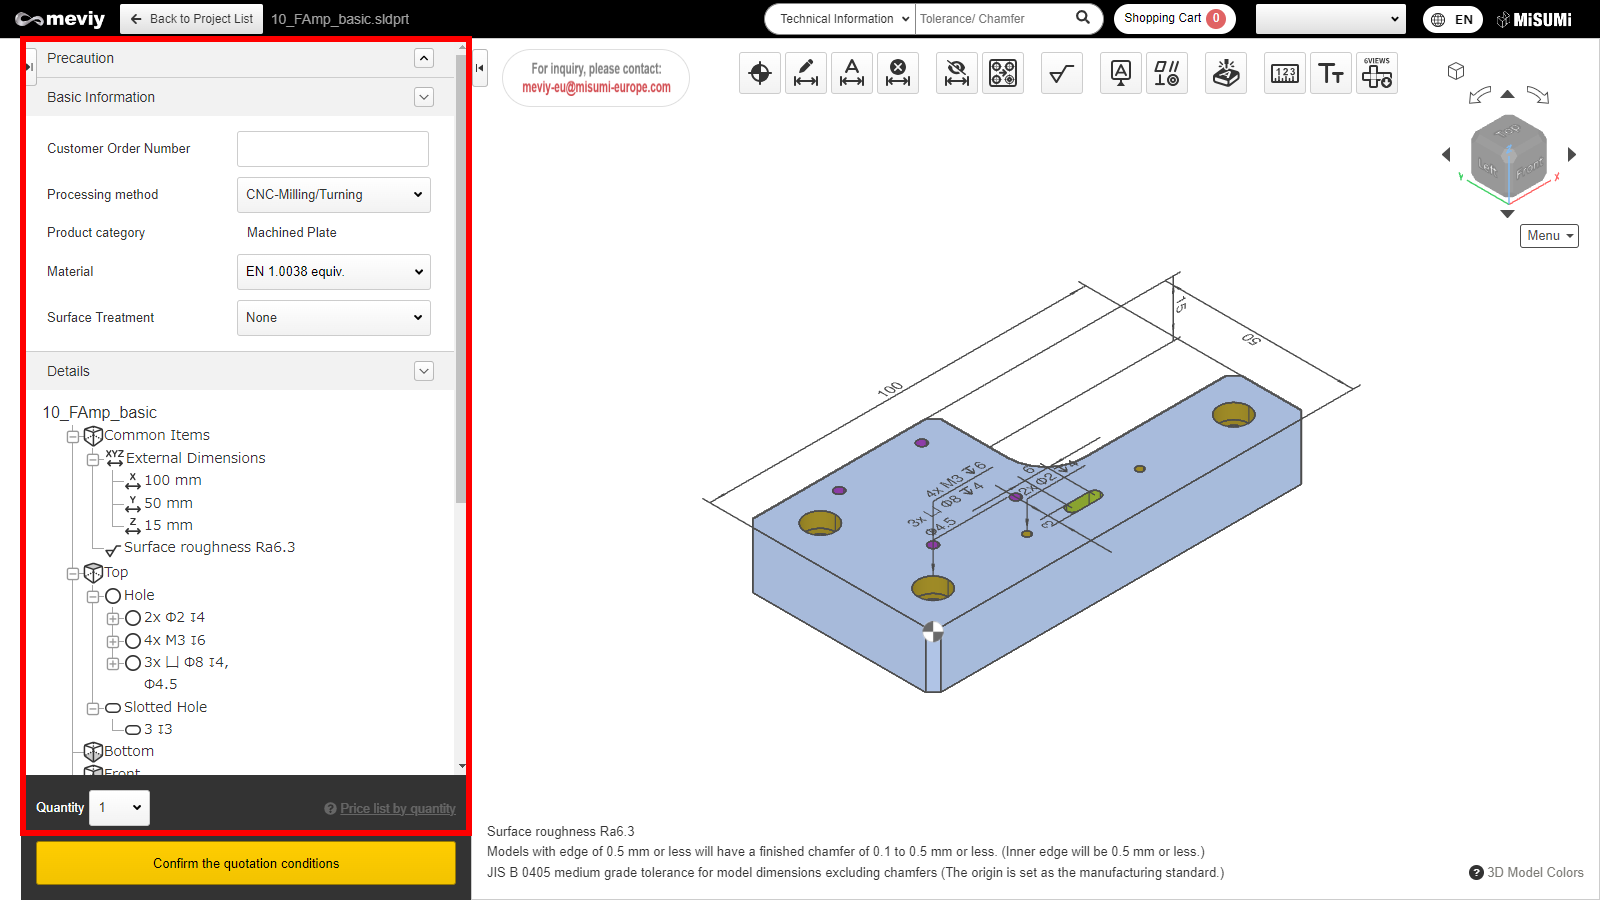
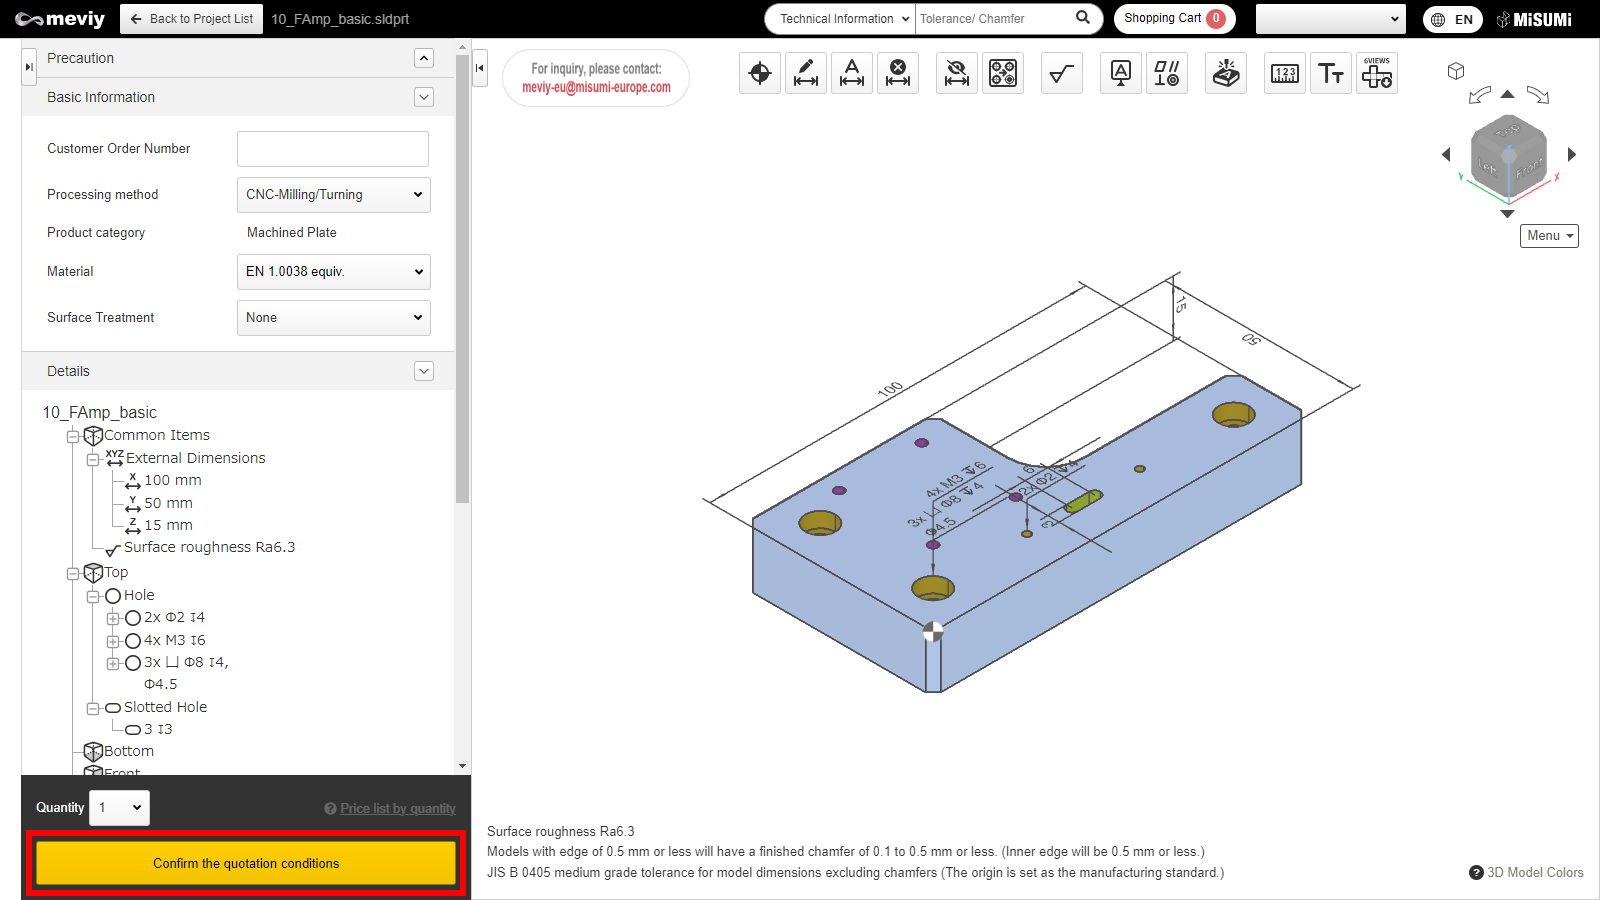
Configure and change the quote specifications as required. Prices and delivery times will be recalculated according to the changed specifications.
Configure basic information for the quotation specifications such as changing the quantities in the quote, changing the materials or surface treatments, setting custom customer PO numbers and entering additional machining instructions. → Setting Basic Information
Confirm the information for the loaded 3D data and modify it if necessary.
If there is a possibility a part you are designing using 3D data will break or become distorted, an approval message will appear in the tree view. Please check this message. → Confirming Approvals