- HELP
- Technical Information
- Sheet Metal Parts
- Applicable parts/Materials
- Bending and R-bending with special tools – Overview materials and sizes
Bending and R-bending with special tools – Overview materials and sizes
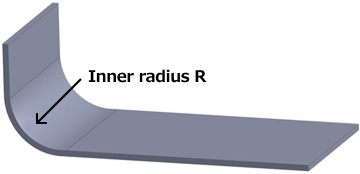
Applicable sheet thickness and Radius size for R-bend shapes
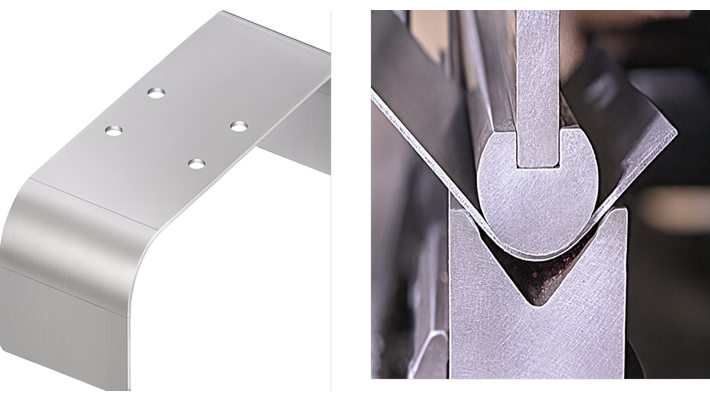
- R-bend shapes are generally manufactured using a feed bending process. This creates continuous tool marks that remain on the bent part. For details, please see “Bending Specifications“.
- If feed bending is difficult, we will propose radius sizes for which normal bending or special R-bend tools can be used. If this is acceptable, we will automatically change the R size on the meviy part.
- For details, please refer to the R-size conversion table below.
■Inner R range that can be feed bent
| Thickness | Minimum inner R | Maximum inner R |
|---|---|---|
| 0.8 | 10 | 150 |
| 1.0 | 10 | 150 |
| 1.2 | 10 | 150 |
| 1.5 | 10 | 150 |
| 1.6 | 10 | 150 |
| 2.0 | 10 * | 150 |
| 2.3 | 15 | 150 |
| 2.5 | 10 | 150 |
| 3.0 | 30 | 150 |
| 3.2 | 30 | 150 |
*Steel material minimum inner R is R15.

■R-size conversion table for when Feed bending is not possible.
| Inner R size before conversion | Inner R size after conversion | Bending process used |
|---|---|---|
| Within twice the sheet thickness | Thickness (reference value) | Normal Bending |
| Less than R3 | Thickness (reference value) | |
| R3 ≤ R < R6 | R3 | R-bending with special tools |
| R6 ≤ R < R10 | R6 | |
| R10 ≤ R < R12.5 | R10 | |
| R12.5 ≤ R < R15 | R12.5 | |
| R15 ≤ R < R17.5 | R15 | |
| R17.5 ≤ R < R20 | R17.5 | |
| R20 ≤ R < R22.5 | R20 | |
| R22.5 ≤ R < R25 | R22.5 | |
| R25 ≤ R < R30 | R25 | |
| R30 ≤ R |
| ー |

Applicable materials and surface treatments for R-bend shapes
Materials and surface treatments available for R bending are as follows.
| Material: Steel | Surface Treatment | R bending available | |
|---|---|---|---|
| Feed Bending | R-bending with special tools | ||
| – | Automatic Quotation | Automatic Quotation |
| Powder Coating | |||
| Painting | |||
| Electroless Nickel Plating | |||
| Black Oxide | |||
| Trivalent Chromate (clear) | |||
| Trivalent Chromate (Black) | Automatic Quotation | Manual Quotation | |
EN 1.0330 equiv. (Electrolytic Zinc Plating) | Electrolytic Plating | Automatic Quotation | Automatic Quotation |
EN 1.0330 equiv. (Galvanized) | Galvanized | ||
| Material: Stainless Steel | Finishing Method | R bending available | |
|---|---|---|---|
| Feed Bending | R-bending with special tools | ||
| EN 1.4301 equiv. | 2B | Automatic Quotation | Automatic Quotation |
|
Manual Quotation | ||
|
Manual Quotation | Not Supported | |
| EN 1.4016 equiv. | 2B | Automatic Quotation | Automatic Quotation |
| Material: Aluminum | Surface Treatment | R bending available | |
|---|---|---|---|
| Feed Bending | R-bending with special tools | ||
| EN AW−5052 equiv. | — | Automatic Quotation | Automatic Quotation |
| Anodized (clear) | |||
| Anodized (Black) | |||
| Anodized (matt black) | |||
| Trivalent Chromate Passivation (SurTec 650) | |||
| Clear Anodize | ||
| Black Anodize | ||
| Material: Perforated Metal | Hole Diameter × Hole Pitch | R bending available | |
|---|---|---|---|
| Feed Bending | R-bending with special tools | ||
| ø1 × 2p | Automatic Quotation | Automatic Quotation |
| ø2 × 3p | |||
| ø3 × 5p | |||
| ø5 × 8p | |||
| ø8 × 12p | |||