- HELP
- Technical Information
- CNC Turning
- Accuracy and Machining Specifications
- Accuracy and Machining Specifications
Accuracy and Machining Specifications
Appearance Quality
Machining surface (outer diameter)
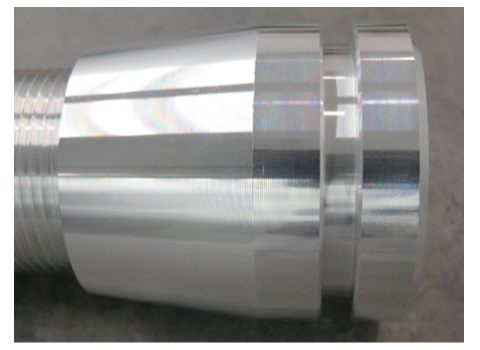
EN AW−5056 Equiv.
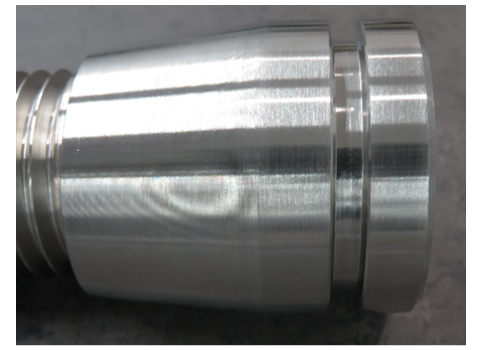
EN 1.1191 Equiv.
Notes
- There will be no scratches of more than 0.7 mm on the surface.
- Surface roughness: √Ra6.3 [√Rz25]
- Depending on the material and size, the product may be supplied with an untreated surface.(polishing and rolling). Please see below for details.
- See below for more details → [FA Mechanical Parts] Turning Parts>Conditions of Use for Standard Materials (Polished bars and Cold finished material)
Machining surface (inner diameter)
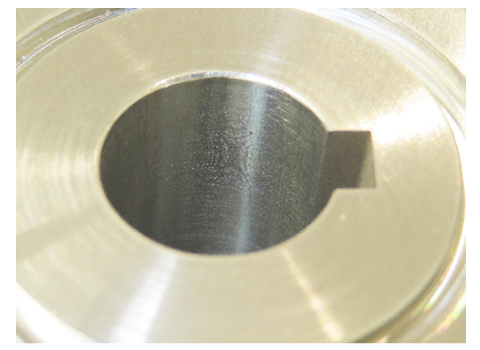
EN 1.1191 Equiv.
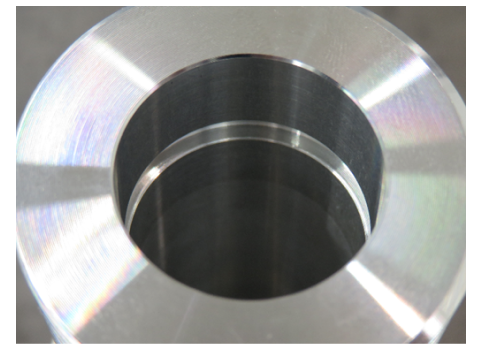
EN 1.4301 Equiv.
Milling face
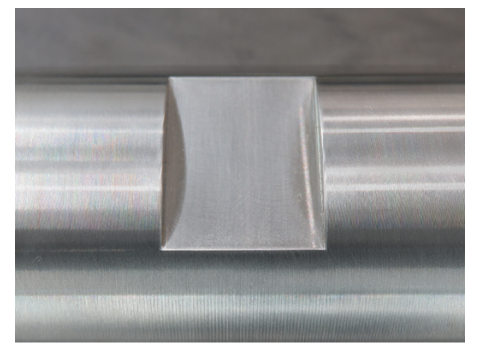
EN 1.1191 Equiv.
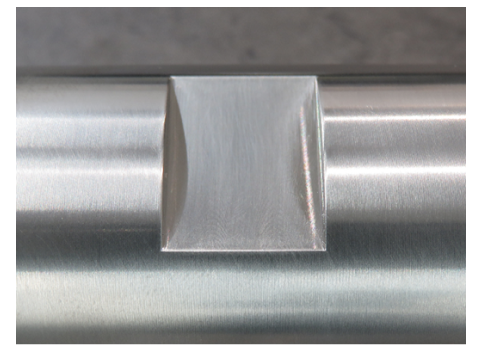
EN 1.4301 Equiv.
Caution
Machining marks may remain.Cut off
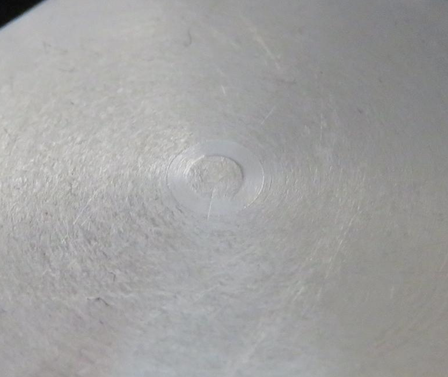
Cutting
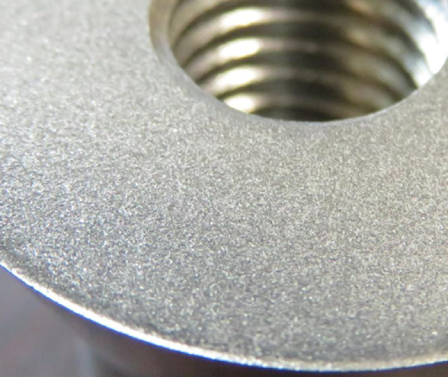
Wire Cutting
Caution
Processing method cannot be specified.Wire-Cut EDM Surfaces
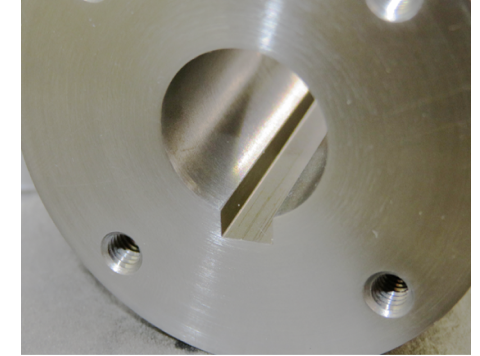
Wire-cut EDM surface
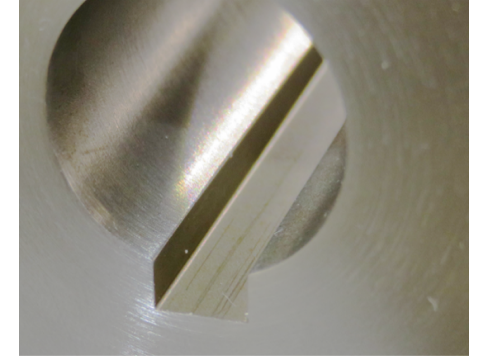
Enlarged view: Wire-cut EDM surface
Surface Treatment Quality Standards
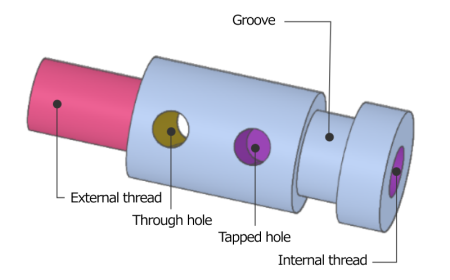
Caution
- Since it is difficult to check the coating thickness for small diameter precision holes, etc., additional machining may be performed after machining, so the surface treatment cannot remain on the cut surface.
- The surface treatment may not remain on the inside of holes as holes may be masked.
- Surface treatment suspension and electrode contact marks may remain on the product.
- To ensure contact for the following applicable surface treatments, at least one hanging shape from (1) to (5) above is required.
- If there is no feature in the model for hanging the part, a through-hole will be made at any position for hanging.
| Surface Treatment | Hanging Holes |
|---|---|
| Electroless Nickel Plating | ー |
| Hard Chrome | Target |
| Trivalent Chromate (Clear) | Target |
| Trivalent Chromate (Black) | Target |
| Black Oxide | ー |
| Salt-Bath Soft Nitriding | ー |
| Low Temperature Black Chrome | Target |
| Phosphating | ー |
| Clear Anodize | Target |
| Black Anodize | Target |
| Black Anodize (Matte) | Target |
| Hard Anodize (clear) | Target |
| Passivation | Target |
| Trivalent Chromate Passivation (SurTec 650) | Target |
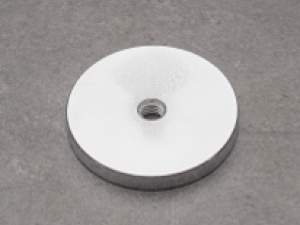 |
 |
 |
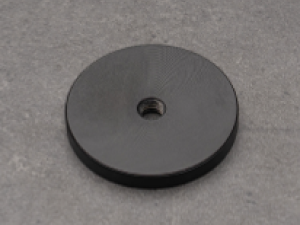 |
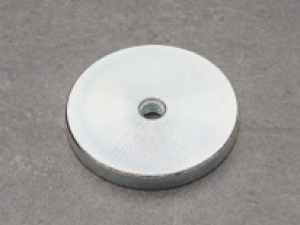
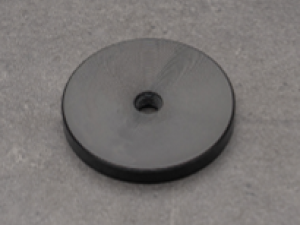
| Hard Chrome | Trivalent Chromate (Clear) | Trivalent Chromate (Black) | Low Temperature Black Chrome |
 |
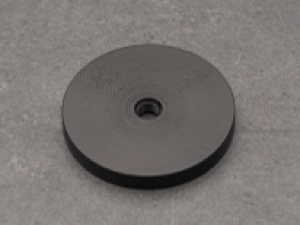 |
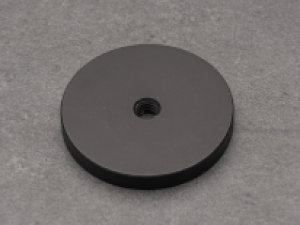 |
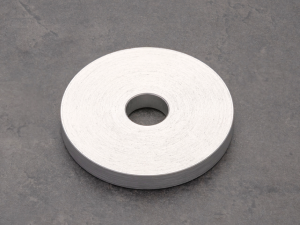 |
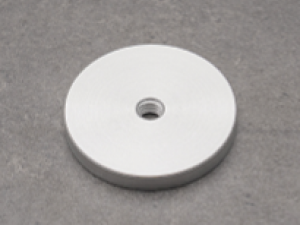
| Clear Anodize | Black Anodize | Black Anodize (Matte) | Hard Anodize (clear) |
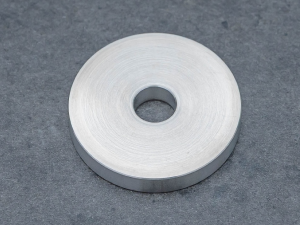 |
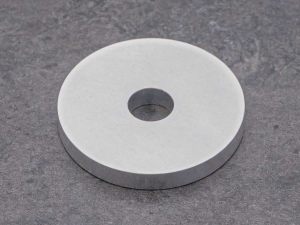 |
||
| Passivation | Trivalent Chromate Passivation (SurTec 650) |
Quenching Quality Standards
About hardening quality assurance
The hardness value specified is guaranteed and will be measured and confirmed before shipping.
Appearance after quenching
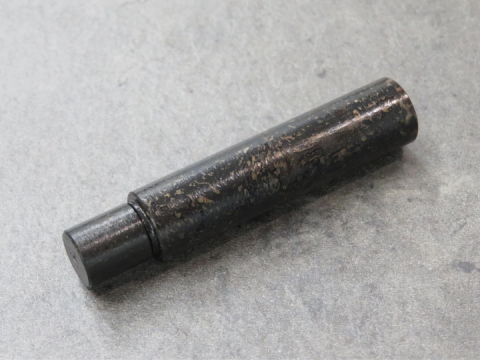
After quenching
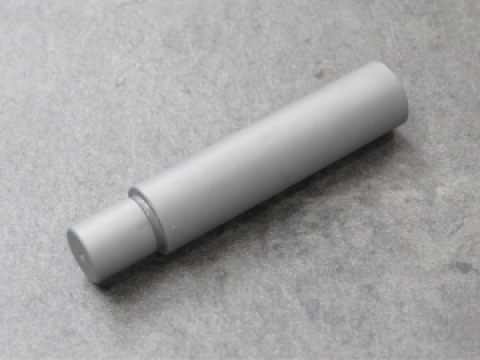
Blast Finish
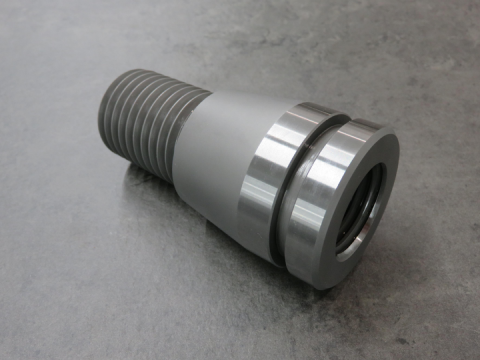
Grinding finishing (outer diameter)
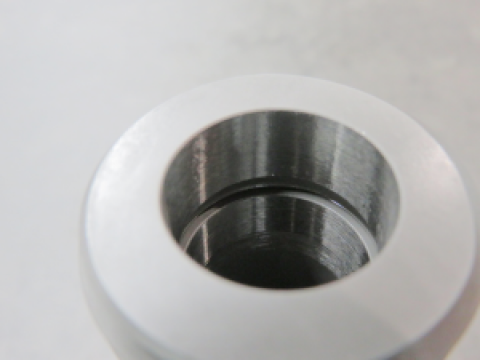
Grinding finishing (inner diameter)
Caution
- The surface can be cleaned by sandblasting after hardening. The accuracy is not reduced by this process.
- The photo shows sandblasting, but in some cases shotblasting can also be used. The blasting method cannot be specified.
- If there are tolerances for the outer and inner diameters, grinding may be included the finishing process. In this case, the appearance will change as shown in the figure above.
- Grinding cannot be specified. Whether to grind is decided in the factory under the aspect of quality assurance.
- The threads will also be hardened. Depending on the application, the thread may be damaged. If you do not want the thread to be hardened, please specify Selective Hardening (Induction Hardening) to select an area that does not include the thread.
- Hardness measurement marks may remain in areas where surface roughness is not specified or near the center of the end face of the part. To confirm the inspection points in advance, please add information in the comments and request a manual quote
Induction Hardening
Caution
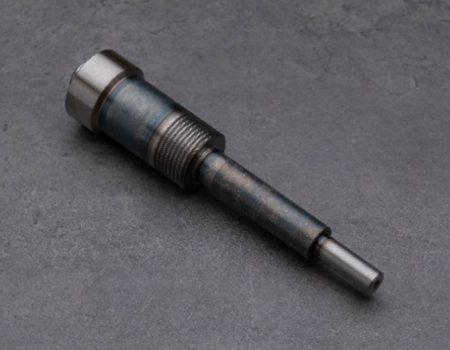
- ・Grinding may be performed to guarantee accuracy for tolerances on the outer or inner diameter. The appearance of ground surfaces will be as shown in the above figure.
- ・Grinding cannot be specified. The factory will determine if grinding is necessary to guarantee dimensional accuracy.
- ・A hardened depth of 1mm or more into the part surface is guaranteed. The hardened depth may be 1.5 mm or more.
- ・The hardened depth cannot be specified.
- ・The Induction Hardening process may also harden edges and surfaces adjacent to the surface specified for hardening.
Conditions of Use for Standard Materials (Polished bars and Cold finished material)
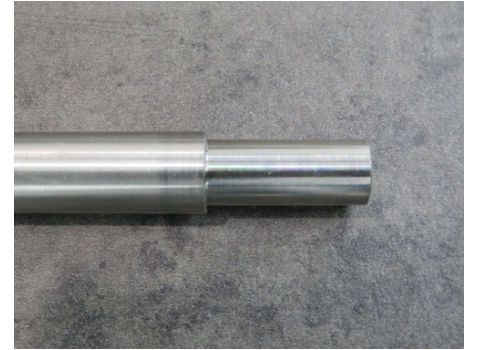
Machined
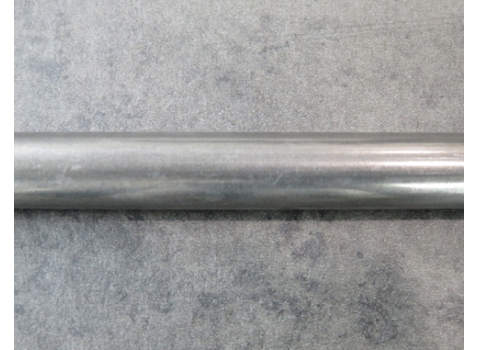
Cold finished material
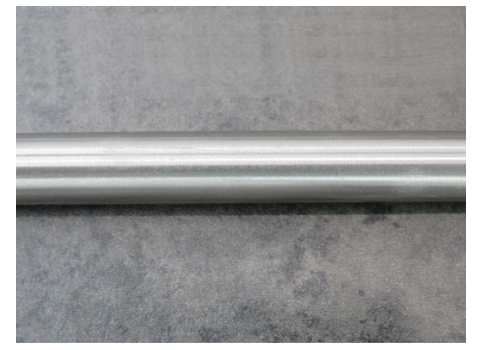
Polished bar
Selection conditions for standard materials
| Tolerance | |||||
|---|---|---|---|---|---|
| IT6 | g6, h7 | h9 | Other (IT7 or above, general tolerance, etc.) | ||
| Surface Roughness | Ra6.3 | Machined | Polished bar or Machined | Polished bar, Cold finished material, or Machined | Polished bar, Cold finished material, or Machined |
| Ra3.2 | Machined | Polished bar or Machined | Polished bar, Cold finished material, or Machined | Polished bar, Cold finished material, or Machined | |
| Ra1.6 | Machined | Polished bar or Machined | Machined | Polished bar or Machined | |
Standard material correspondence table
| Material | Machined | Cold finished material(h9) | Polished bar(g6, h7) |
|---|
| EN 1.1191 equiv. | 〇 | 〇 | 〇 |
|---|---|---|---|
| EN 1.0038 equiv. | 〇 | 〇 | |
| EN 1.7220 equiv. | 〇 | ||
| EN 1.7220 equiv. (Reference Hardness: 26-32 HRC) | 〇 | ||
| EN 1.2825 equiv. | 〇 | ||
| EN 1.2379 equiv. annealed | 〇 | ||
| EN 1.2344 equiv. | 〇 | ||
| EN 1.3505 equiv. | 〇 | ||
| EN AW−2017 equiv. | 〇 | ||
| EN AW-5052 equiv. | 〇 | ||
| EN AW−5056 equiv. | 〇 | ||
| EN AW−6061 equiv. | 〇 | ||
| EN AW−7075 equiv. | 〇 | ||
| EN 1.4305 equiv. | 〇 | 〇 | |
| EN 1.4301 equiv. | 〇 | 〇 | |
| EN 1.4401 equiv. | 〇 | 〇 | |
| EN 1.4404 equiv. | 〇 | ||
| 1.4125 equiv. annealed | 〇 | ||
| Brass C3604-LCd | 〇 | ||
| POM (white, black) | 〇 | ||
| MC Nylon (blue,black ash) | 〇 | ||
| ABS (natural color, black) | 〇 | ||
| PEEK (grey-brown) | 〇 | ||
| PC (transparent, black) | 〇 | ||
| PP (Standard, natural color) | 〇 | ||
| PPS (transparent, natural color) | 〇 | ||
| Acrylic (Standard, transparent) | 〇 | ||
| UHMWPE (white) | 〇 | ||
| PVC(grey) | 〇 |
Round bar specification table
| Material | Maximum Diameter (h9) |
|---|
| EN 1.0038 equiv. | diameter 3 to diameter 30 (1 mm increments) |
|---|---|
| ø32 | |
| ø34 | |
| ø35 | |
| ø36 | |
| ø38 | |
| ø40 | |
| ø42 | |
| ø44 | |
| ø45 | |
| ø46 | |
| ø48 | |
| ø50 | |
| ø52 | |
| ø55 | |
| ø56 | |
| ø58 | |
| ø60 | |
| ø65 | |
| ø70 | |
| ø75 | |
| ø80 | |
| ø85 | |
| ø90 | |
| ø95 | |
| ø100 | |
| ø105 | |
| ø110 | |
| ø115 | |
| ø120 | |
| ø125 | |
| ø130 | |
| ø140 | |
| ø150 |
| Material | Maximum Diameter (g6, h7, h9) |
|---|
| EN 1.1191 equiv. | ø3~ø30 (1 mm increments) |
|---|---|
| ø32 | |
| ø34 | |
| ø35 | |
| ø36 | |
| ø38 | |
| ø40 | |
| ø42 | |
| ø44 | |
| ø45 | |
| ø46 | |
| ø48 | |
| ø50 |
| Material | Maximum Diameter (h9) |
|---|
| EN 1.1191 equiv. | ø52 |
|---|---|
| ø55 | |
| ø60 | |
| ø65 | |
| ø70 | |
| ø75 | |
| ø80 | |
| ø85 | |
| ø90 | |
| ø95 | |
| ø100 | |
| ø110 | |
| ø120 | |
| ø130 | |
| ø140 | |
| ø150 |
| Material | Maximum Diameter (g6, h7) |
|---|
| EN 1.4305 equiv. EN 1.4301 equiv. EN 1.4401 equiv. | ø3~ø18(1 mm increments) |
|---|---|
| ø20~ø26(1 mm increments) | |
| ø28 | |
| ø30 | |
| ø32 | |
| ø35 | |
| ø36 | |
| ø38 | |
| ø40 | |
| ø42 | |
| ø45 | |
| ø50 |
| Material | Maximum Diameter (h9) |
|---|
| EN 1.4305 equiv. EN 1.4301 equiv. EN 1.4401 equiv. | ø55 |
|---|---|
| ø60 | |
| ø65 | |
| ø70 | |
| ø75 | |
| ø80 | |
| ø85 | |
| ø90 | |
| ø95 | |
| ø100 |
| Material | Maximum Diameter (h9) |
|---|---|
| EN 1.7220 equiv. | ø4~ø12(1 mm increments) |
| ø12.7 | |
| ø13~ø21(1 mm increments) | |
| ø22 | |
| ø24 | |
| ø25 | |
| ø26 | |
| ø28 | |
| ø30 | |
| ø32 | |
| ø35 | |
| ø40 | |
| ø45 | |
| ø50 |
Caution
- If it is not included in the standard table, it will be shaved.
- For others, the raw material is more likely to be chosen as the standard material.
Tip

What is maximum diameter?
- The maximum diameter refers to the largest diameter on the cylindrical surface of the product. (highlighted in light blue)
- Even if the surface is divided by a groove as shown in Example 3, the surface is recognised as a single element if it has the same diameter.

Figure 1


Figure 3
Applicable conditions for Hexagonal rod
If the distance across the flats of the hexagon matches a standard size, it is processed with hexagonal bar stock and shipped.
Hexagonal surfaces may be scratched because they are stock, unmachined surfaces.
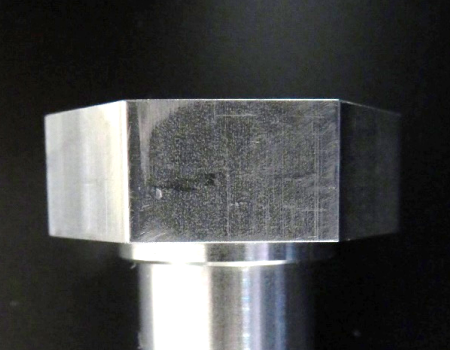
Example (1)
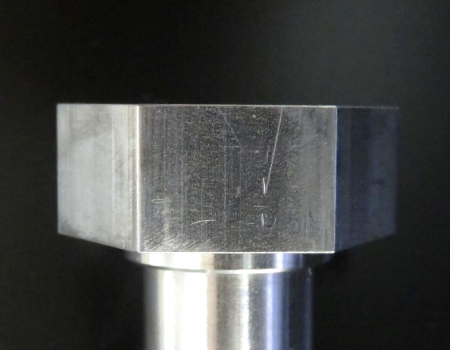
Example (2)
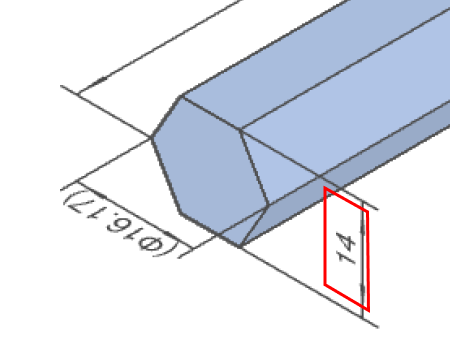
What is the distance across the flats?
The distance between two opposite sides of a hexagon.
Hexagonal rod standards and specifications table
| Material | ||||||||||
|---|---|---|---|---|---|---|---|---|---|---|
| Tolerance(h12) | Tolerance | |||||||||
| EN 1.1191 equiv. | EN 1.0038 equiv. | EN 1.7220 equiv. | EN 1.4305 equiv. | EN 1.4301 equiv. | EN 1.4401 equiv. | Brass C3604-LCd | ||||
| Distance across the flats | 6 | 〇 | 〇 | × | 〇 | 〇 | × | 0 -0.15 | 〇 | ±0.06 |
|---|---|---|---|---|---|---|---|---|---|---|
| 7 | 〇 | 〇 | × | 〇 | 〇 | 〇 | 〇 | ±0.08 | ||
| 8 | 〇 | 〇 | 〇 | 〇 | 〇 | 〇 | × | |||
| 9 | 〇 | 〇 | × | × | × | × | × | |||
| 10 | 〇 | 〇 | 〇 | 〇 | 〇 | 〇 | 0 -0.18 | 〇 | ||
| 12 | 〇 | 〇 | 〇 | 〇 | 〇 | 〇 | 〇 | ±0.11 | ||
| 13 | 〇 | 〇 | 〇 | 〇 | 〇 | 〇 | × | |||
| 14 | 〇 | 〇 | 〇 | 〇 | 〇 | 〇 | 〇 | |||
| 17 | 〇 | 〇 | 〇 | 〇 | 〇 | 〇 | 〇 | |||
| 19 | 〇 | 〇 | 〇 | 〇 | 〇 | 〇 | 0 -0.21 | 〇 | ||
| 21 | 〇 | 〇 | 〇 | 〇 | 〇 | 〇 | × | ±0.18 | ||
| 22 | 〇 | 〇 | 〇 | 〇 | 〇 | 〇 | 〇 | |||
| 23 | 〇 | 〇 | 〇 | 〇 | 〇 | 〇 | × | |||
| 24 | 〇 | 〇 | 〇 | 〇 | 〇 | 〇 | 〇 | |||
| 26 | 〇 | 〇 | 〇 | 〇 | 〇 | 〇 | 〇 | |||
| 27 | 〇 | 〇 | 〇 | 〇 | 〇 | 〇 | 〇 | |||
| 29 | 〇 | 〇 | × | 〇 | 〇 | 〇 | × | |||
| 30 | 〇 | 〇 | × | 〇 | 〇 | 〇 | 0 -0.25 | 〇 | ||
| 32 | 〇 | 〇 | × | 〇 | 〇 | 〇 | 〇 | |||
| 35 | 〇 | 〇 | × | 〇 | 〇 | 〇 | 〇 | |||
| 36 | 〇 | 〇 | × | 〇 | 〇 | 〇 | × |